
Dear XAG LNT users,
XAG has announced a major LNT firmware update v1.0.0.31 available for updating, please update your LNT by following the instructions attached before 7th Dec (GMT+8).
XAG has released major LNT firmware version v 1.0.0.31 available for updating.
Here’s a quick overview:
Resolve the issue of devices disappearing from the device page.
Bugs fix and improvement in the system stability.
Improvement in system communication Please note that this firmware update is mandatory for all users, any historical version of LNT (1.0.0.18, 1.0.0.29 etc…) will be no longer operational after 7th December (GMT+8). Please update the LNT following the instructions below.
Before start updating, please have the following items:
Type C to male USB adaptor.
USB flash drives 16GB or above, FAT32 format.
Firmware downloaded via https://drive.google.com/drive/folders/1N6pzVET3l5sSC4InW3ogidVN0uWnZzxd?us p=sharing
Download the zip file and decompress it onto the laptop/desktop. Copy and paste the firmware file named: image.des.3 to the flash drive. An empty flash drive is preferred. a. Plug the USB flash drive into LNT via Type C to the male USB adaptor while LNT is on.
a. Plug the USB flash drive into LNT via Type C to the male USB adaptor while LNT is on.
You can choose to place an order on our website, or buy it at the store closest to you.

b. The update will start automatically in about 10s, and the fourth light from the left will be flashing.
c. The update process may take about 25-30 min.
d. All indicators will stay solid green after the update is complete.
e. Restart the LNT once the update is complete.
If the LNT indicator won’t flash after the flash drive has been plugged in, please try with another flash drive.
Post LNT firmware update
Add LNT to the device page.
a. Connect the LNT to the external hotspot by logging in to http://www.iotlogin.com/en/login.html and then enable ‘ WAN Mode ’ on the Route Setup page.

b. Select and connect to the available hotspot on the Wireless Connection page.
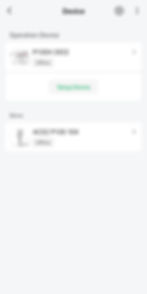
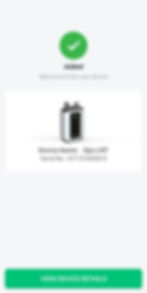
c. Go to the Device page in the APP, and click on ‘ + sign ’ on the top right-hand side corner and select ‘ Add LNT ’.

d. Click on ‘ Connected and Next ’ when the phone is connected to LNT WiFi. Following instructions in the app and waiting for LNT to be added.
2. Synchronize the LNT with the server.
a. While the LNT is connected to the external hotspot, leave it on for two nights to synchronize the configuration files and firmware.
LNT > Date Sync

b. Please note that it is highly recommended to leave the LNT overnight for synchronizing flight records after the day of operation.
3. Update firmware for UAV, ACS2 and RTK4
a. Check the device’s firmware and update them after LNT has been synchronized.
4. Flight Test
a. Please perform an actual flight test after a major firmware update, and pay attention to system connection, UAV performance, RTK connection etc…
Or To have a better understanding about our new firmware for LNT. You can watch the meeting recording by this link.
GD link:
If you have any issues, please contact us via email at support@xagaustralia.com.au